AI Tools 101
PromeAI Review: These AI Renders Nailed My Rough Sketch

 Add Unite.AI to your preferred sources on Google
Unite.AI may receive compensation when you use links to products we review. This does not influence our editorial evaluations. Read our affiliate disclosure.

You have a design idea and a rough sketch of it. However, your client, though wants to see what it will actually look like: the materials, the light, the mood.
Getting there usually means hours of 3D modeling and rendering. The other option? Paying an artist before you even know whether the idea is worth pursuing. Neither option sounds the most ideal, if you ask me.
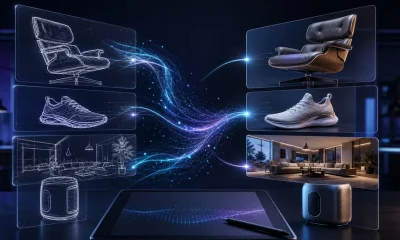
That’s the gap PromeAI is built to close. You upload a sketch, a CAD screenshot, or a photo, describe the look you want, and it turns the drawing into a photorealistic render in seconds. It’s also grown into a hub for third-party image and video models such as GPT Image 2.5, Nano Banana Pro, and Seedance.
I tested PromeAI on three tasks: rendering a rough sketch of a modern house, turning that render into a snowy winter evening, and animating it into a short video.
In this PromeAI review, I’ll show you how it worked, where it impressed me, and where I think it still falls short. I’ll finish the article by comparing it to my top three alternatives (Dzine, OpenArt, and Vizcom). By the end, you’ll know which tool is right for you!
Verdict
PromeAI is one of the fastest and most affordable tools I’ve found for turning rough architectural sketches into realistic renders. But it’s not perfect. It sometimes adds details that aren’t in the original sketch, and some downloads have a lower resolution than the original image.
Pros and Cons
- Turned a pencil sketch into three realistic renders in under 30 seconds.
- Kept the original roofline, building shape and window layout.
- Very low cost at just 0.3 coins for three images.
- Changed my render to a winter evening without noticeably changing the house.
- Generated smooth 1080p videos without watermarks or warped buildings.
- Includes 15 image models and 13 video models.
- Offers presets for architecture, interiors, landscapes, furniture and more.
- Includes 40+ tools for rendering, editing, upscaling and 3D models.
- Offers 2× and 4× image upscaling up to 5460 × 3072.
- Scenario Changer’s full-size download was only 682 × 384, half the resolution of the original render.
- Renders sometimes add unwanted details or ignore material instructions.
- Scenario Changer sometimes changes background details or misses snow effects.
- 1080p video costs five times more than 480p.
- The Base plan doesn’t allow commercial use. That starts on the Standard plan.
What is PromeAI?
PromeAI is an online AI design platform with sketch-to-render tools for architects and designers. That’s what it’s best known for: you give it a line drawing, a SketchUp or Rhino screenshot, or a photo, and it produces a realistic render that follows the original’s structure.
When I first reviewed PromeAI, that was most of the story. Today, Prome has over 2 million users, and the product has changed a lot.
From Sketch Renderer to Multi-Model Hub
PromeAI combines its sketch-rendering and design tools with access to third-party AI models, including Google’s Nano Banana, OpenAI’s GPT Image, and ByteDance’s Seedream for images. On the video side, it includes Seedance, Wan, MiniMax, and LTX.
It also has a growing set of industry tools. Architects and interior designers get Interior Remodel, Exterior Renovator, Scenario Changer, and a Panorama Generator. Product and fashion teams get a Mockup Generator, Virtual Try-On, and an AI 3D model generator. There are also general AI art generator tools like logo, sticker, and pixel-art makers.
Two Kinds of Models
One thing to note: Sketch Rendering lists V1, V2, and V3 model options, while Scenario Changer lists V1 and V2. Neither selector identifies the underlying models by name. PromeAI separately offers third-party models such as GPT Image, Nano Banana, Seedream, and Seedance.
In my testing, both tools followed the input image closely and used very few credits per generation.
How Coins Work
Everything runs on coins. In my tests, Sketch Rendering cost 0.3 coins for a batch of three images, while a 5-second 1080p video on Seedance 1.5 Pro cost 50 coins. That difference is the key to understanding PromeAI’s pricing: rendering images is almost free, but video eats through coins fast.
Who is PromeAI Best For?
Here’s who PromeAI is best for:
- Architects can turn rough building sketches or CAD screenshots into professional concepts that render in seconds. They can also test different materials before settling on a design direction.
- Interior designers can restyle a room photo or explore design directions without building a 3D model first.
- Real estate marketers can show the same property at dusk or in different seasons using a single render. They can also turn still images into short walkthrough-style clips for listings.
- Product and industrial designers can render quick concept sketches of furniture, footwear, packaging, or electronics using scene presets.
- Landscape designers can visualize planting, hardscaping, and lighting around an existing building.
- Game and concept artists can turn rough environment or character sketches into concept art for pitches.
- Fashion and e-commerce brands can use Virtual Try-On and the Mockup Generator for product visuals.
- Small studios that want rendering, editing, upscaling, and video in one subscription instead of paying for several tools.
PromeAI Key Features
Here are the key features that stood out to me:
- Sketch Rendering: Turns a sketch, line drawing, or 3D screenshot into a realistic image with style, scene, and mode controls. Modes range from “Precise” (follows your lines closely) to “Concept” (more creative).
- Scene Presets: Category presets like Residence Building, Commercial Space, Footwear Design, and Packaging Design steer the output toward the right subject without long prompts.
- Styles & Reference Images: Sketch Rendering offers dozens of styles across photography, 3D, illustration, and art. You can also upload a reference image to match an existing look.
- Scenario Changer: Changes the environment around a subject (season, weather, time of day) without changing the subject itself.
- Interior Remodel & Exterior Renovator: Tools for restyling existing room and building photos for interior design and renovation projects.
- Region Rendering and Erase & Replace: Edit only part of an image (such as swapping a sofa or removing an object) instead of regenerating the whole thing.
- Image to Video: Animates any image with your choice of video model (Seedance, Wan, MiniMax, LTX, and others) at up to 4K and 12 seconds.
- AI Image Generator: Text-to-image and image editing with GPT Image 2.5, Nano Banana Pro, Seedream, and Qwen.
- HD Upscaler: The download menu offers 2× (2730 × 1536) and 4× (5460 × 3072) upscaled versions (marked as premium options) which are useful for print. For standalone options, see this list of AI image upscalers.
- Generation History & Remixing: Every render is saved with its prompt and settings, so you can reuse an output as the input for another tool. That’s how I chained all three of my tests.
Hands-On Testing: What PromeAI Actually Produced
I focused my testing on what most architects and designers buy PromeAI for: how well it renders a sketch and edits a scene, and whether it can turn an image into usable video. Each test built on the one before it.
Test 1: Rendering a Rough Sketch of a House

For my first test, I uploaded a rough pencil-style sketch of a modern two-storey house. It has a slanted overhanging roof, a ribbon window upstairs, four glass panels downstairs, a patio, a tree, and a stick figure for scale.
I uploaded it to “Sketch Rendering” with Model V2, the Realistic style, the Residence Building scene, and the default Detail mode.
My prompt was:
“Photorealistic architectural exterior render of a modern two-storey house with a slanted cantilevered roof, vertical cedar cladding on the upper floor, white render walls, floor-to-ceiling glass sliding doors on the ground floor, concrete patio in front, a tree on the left, low shrubs, late afternoon golden-hour light, hills in the background”

PromeAI returned three 1365 × 768 renders in under 30 seconds, for 0.3 coins in total.

My Take
This was the most impressive result of my tests. All three renders kept the “bones” of my sketch: the slanted roofline, the upper ribbon window, the four-panel glazing downstairs, and the two stacked windows on the side. For a rough sketch with wobbly lines, that’s a pretty close match.
The first render was good enough to show a client. It has white walls, cedar on the upper floor, a concrete patio, a tree on the left, hills, and warm golden-hour light. You can even see furnished rooms through the glass. The one thing was it changed my ribbon window into a recessed section of the upper floor with a concrete parapet, but I actually liked the look of it.
The other two strayed a bit more from what I was envisioning. Render 2 wrapped the whole facade in timber despite my “white render walls” instruction, and added a concrete volume and a chimney that aren’t in my sketch, whereas Render 3 swapped the lawn for gravel.
Test 2: Changing the Scene to a Snowy Winter Evening
For my second test, I took the best render from Test 1 into “Scenario Changer,” which is designed to change the environment without redesigning the subject.
My prompt was:
“Same house on a snowy winter evening, fresh snow on the roof, lawn and patio, warm interior lights glowing through the windows, soft blue dusk sky, snow-covered trees and hills”

Prome managed to produce three winter versions in about 75 seconds for 0.3 coins.

My Take
The house itself barely changed, which is exactly what this tool promises. The roofline, balcony, and windows were all in the same place, and the warm interior lighting against the blue dusk sky looked convincing.
However, the surroundings were a different story. PromeAI replaced my hills with a dense pine forest and removed the tree on the left. More importantly, two of the three images had almost no snow on the roof even though I asked for it specifically. Only one got the roof right.
Resolution was the other surprise. Scenario Changer’s “Full Download” was only 682 × 384, half the size (width and height) of the Sketch Rendering output, so you’d need to send it through the HD Upscaler before using it anywhere larger than a social post.
For a real estate listing or a mood board, the best of the three is usable. But for a client who expects the actual site context, I’d need to generate another round or do some editing.
Test 3: Animating the Render Into a Video
For my final test, I fed the Test 1 render into Image to Video using Seedance 1.5 Pro at 1080p for 5 seconds.
My prompt was:
“Slow cinematic drone push-in toward the house at golden hour, warm interior lights flicker on, leaves on the tree sway gently in the breeze, soft clouds drift across the sky, the building stays perfectly still”
Prome produced a 5-second, 1920 × 1080 MP4 in about 2 minutes, for 50 coins. It had no audio, since I left the optional audio setting off.
My Take
The camera’s movement was smooth and slow, and the building stayed solid the whole way through. I didn’t see bending walls, melting window frames, or shifting proportions, which is the most common failure in architectural AI video.
The secondary motion was there, but very restrained. I didn’t see the leaves on the tree shift at all, and the cloud drifted a little, which you’ll only notice if you look for it. The interior lights were already on in the source image, but I did notice one light turn on.
As a quick social clip or a listing teaser, this works. But at 50 coins per 1080p clip, Standard’s 2,000 coins only cover about 40 videos a month if you do nothing else.
Results & Output Quality
- Structural accuracy: This is PromeAI’s biggest strength, and probably the most important. Across all three tests, the house kept the same roofline, window layout, and proportions.
- Prompt accuracy: This was weaker. One of three sketch renders followed my material instructions closely. The others added a chimney and an extra concrete volume, or ignored “white walls.” Two of three winter scenes ignored “snow on the roof.”
- Realism: The renders looked professional at a glance, with believable materials, lighting, and furnished interiors.
- Resolution: Sketch renders downloaded at 1365 × 768, and Scenario Changer at just 682 × 384. Both are fine for screens, but print or large presentations will need the upscaler.
- Consistency: Each batch of three varied a lot, which is useful for exploring options. But it also means you’ll usually pick one and discard the rest.
- Speed: Sketch renders came back in under 30 seconds, and Scenario Changer took about 75 seconds. The 1080p video took about 2 minutes.
- Editing required: For client presentations, I’d use the best render from each batch. For marketing or construction visuals, I’d still need to fix details it made up.
- Cost vs. output: Rendering is almost free (0.3 coins for three images), so you can iterate without thinking about it. But video is where coins disappear.
How to Use PromeAI

Here’s the workflow that got me the best results:
- Start from a clean input. Upload a sketch, CAD screenshot, or photo to Sketch Rendering. Rough lines are fine, but the clearer your outlines, the more the render will follow them.
- Pick a scene and mode before prompting. The Scene preset (like Residence Building) did more to steer my results than additional prompt words. Use “Precise” or “Structure” modes if you need the geometry locked in, or “Concept” if you want ideas.
- Describe materials and lighting explicitly. Generate a batch, then keep the closest render and discard the rest.
- Chain tools from your history. When you add an input image in another tool (like Scenario Changer or Image to Video) you can pick an earlier generation from your history instead of uploading a file. That’s how I built all three tests from one sketch.
Top 3 PromeAI Alternatives
Here are the best PromeAI alternatives I’ve tried that I’d recommend.
Dzine
My first PromeAI alternative is Dzine. It’s the better choice if you want sketch rendering inside a full design editor, because it works with layers. That means you can render a sketch, edit specific areas, add text and put everything together without leaving the canvas.
Where PromeAI pulls ahead is architecture and product rendering. Its scene presets are designed for buildings, interiors, and products, while Dzine leans toward illustration, marketing graphics, and character design.
Dzine is also more affordable to get started compared to Prome. Its Master plan includes unlimited image generation under fair use.
Choose Dzine if you’re a marketer or illustrator who wants rendering and editing in one place. Otherwise, choose PromeAI for architectural and product visualization.
Read my Dzine review or visit Dzine!
OpenArt
The second PromeAI alternative I’d recommend is OpenArt. It’s a creative platform with access to over 100 image, video, and audio models, plus consistent characters and the ability to generate multiple shots to maintain visual consistency. Its sketch-to-image feature is one option among many rather than the main focus.
That’s the key difference. PromeAI is built around preserving the original structure, while OpenArt is better at exploring different visual styles (like anime and painting styles), and building characters that stay consistent across images and scenes.
Choose OpenArt if you’re an artist or content creator who wants maximum stylistic range. Otherwise, choose PromeAI for design renders that need to match your sketch.
Read my OpenArt review or visit OpenArt!
Vizcom
The final PromeAI alternative I’d recommend is Vizcom. It’s built specifically for industrial and product designers, and its homepage shows logos from world-class brands.
Like PromeAI, Vizcom turns sketches into photorealistic renders. Live Render updates the image as you draw, along with 3D generation, new viewing angles, and team workspaces with editor and viewer roles.
That makes it a better fit for teams developing and refining physical product designs. Meanwhile, PromeAI covers a much wider range, including architecture, interiors, scene changes, and third-party video models.
Choose Vizcom if you design physical products with a team. Otherwise, choose PromeAI for architecture, interiors, and mixed creative work.
PromeAI Review: The Right Tool For You?
What I liked most about PromeAI was how accurately it read my rough sketch. A wobbly pencil drawing became three believable renders in under 30 seconds, and the best one maintained every major design decision I’d drawn.
However, I didn’t like was how freely it improvised. In one of the renders, it added a chimney I never drew, ignored “white walls” in another, and left the roof bare of snow in most of my winter scenes when i explicitly said I wanted that included. These aren’t deal-breakers for concept work, but you’ll have to pick the best of each batch rather than use every output.
I was most impressed by the video it generated. I expected warped walls and melting windows, but the building stayed solid through a smooth 1080p push-in.
If you want to use Prome professionally, the Standard plan is the best starting point because it includes commercial rights. For architects and interior designers who render often, I think the output justifies that price. But if you mainly need video, budget carefully.
If PromeAI isn’t the right fit, consider these alternatives:
- Dzine is best for rendering with layered editing.
- OpenArt is best for exploring many art styles and consistent characters.
- Vizcom is best for product design teams.
Thanks for reading my PromeAI review! I hope you found it helpful. Try PromeAI for yourself and see what it can build for you.
Frequently Asked Questions
Can I use PromeAI images commercially?
Yes, but only on Standard, Pro, or Ultimate. The Base plan is personal-use only, so you’ll need Standard plan or higher for client work.
Is PromeAI good for architects?
Yes, PromeAI is good for architects. In my testing, Sketch Rendering preserved the roofline, window layout, and proportions of a rough house sketch. It also includes scene presets for buildings and interiors. Just expect to pick the best render from each batch, since it sometimes adds elements you didn’t draw.
Is PromeAI worth it?
PromeAI is worth it if you regularly turn sketches or 3D screenshots into concept renders, because rendering is fast and costs a fraction of a coin. However, it’s less worth it if you mainly want AI video, since 1080p clips cost 50 coins each.